
Last summer, a friend packed one carry-on for a long trip. He laid every shirt on the bed, then re-stacked the outfit. Next, he checked the shoe space, charger locations, and passport access. Everything fit, because he saw the whole arrangement at once. After that, he snapped a photo so that the layout would stay repeatable later. At the airport, that tiny snapshot saved him when security unpacked everything. He repacked fast because the picture showed the whole arrangement instantly. That little moment felt oddly satisfying and also very instructive.
Construction teams chase that same everything fits, every single day. A General Arrangement sheet gives that whole-picture confidence, before anyone starts cutting. It shows where things sit, how they relate, and what clashes first. So you estimate faster, coordinate earlier, and get smooth approvals.
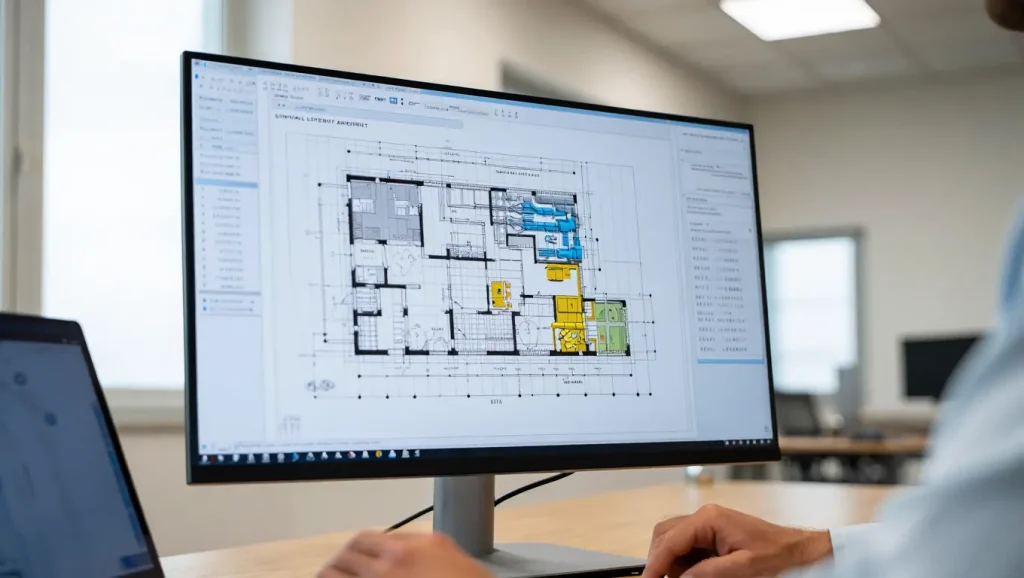
Keep reading if you want to know more about General Arrangement Drawing in BIM!
What are General Arrangement (GA) Drawings?
General Arrangement drawings show the overall layout of a structure or system. In simple terms, this shows how major parts relate. They include dimensions, positions, and relationships between major components.
Using GA drawings, teams can plan work, coordinate trades, and communicate decisions with fewer meetings. You can also get a complete view of how elements fit together in one design. When you treat that overview as a shared reference, you reduce confusion quickly.
Comparison of GA Drawings With Other Types of Drawings in Construction
You can’t manage risk if you mix drawing types in one pile. So let’s compare General Arrangement deliverables with nearby drawing families.
GA Vs Location Drawings
General Arrangement views explain how things fit across a system or structure; however, location drawings focus on where exactly something sits on the site.
| Feature | GA Drawings | Location Drawings |
| Purpose | Show how components fit together | Specify the exact on-site placement |
| Focus | Layout, spatial relationships, orientations | Coordinates, elevations, positioning details |
| Level of detail | Medium, without installation specifics | High, with reference points and precise positioning |
| Typical use | Engineering, manufacturing, and construction planning | On-site installation and placement guidance |
| Typical content | Dimensions, sections, elevations, relationships | Gridlines, reference points, levels, coordinates |
| Typical audience | Engineers, designers, planners | Contractors, installers, and site engineers |
GA Vs Shop Drawings
General Arrangement sheets give an overall view showing how elements fit together. On the other side, detailed component or assembly drawings zoom into specific parts and joints.
| Feature | GA Drawings | Shop Drawings |
| Primary intent | Communicate overall arrangement and relationships | Communicate specific parts for build and assembly |
| Level of detail | Medium, with key sizes and positions | High, with part-focused details and connections |
| Best moment to use | Early coordination and approvals | Component-level execution and assembly |
| Reader mindset | Does the system make sense? | Can we build this piece today? |
GA Vs Layout Drawings
General Arrangement views focus on specific equipment areas and support locations. Meanwhile, BIM layout drawings give the broader positioning picture across the whole space. Layout drawings cover a broader view and show general positioning in a space.
| Feature | GA Drawings | Layout Drawings |
| Scope | Focused zones, often equipment-centered | Broader project positioning |
| Detail emphasis | Support locations and types for on-site fabrication | General placement and spatial planning |
| Best use | Relating components inside a defined area | Setting the overall arrangement within a space |
This entire game is played in the BIM world. Explore our guide, What is BIM to get a A Complete Guide to Building Information Modeling!
Purpose of GA Drawings
● Design Communication
General Arrangement drawings communicate design intent to every project role. They translate design decisions into views that builders can actually act on. This helps you avoid argument moments.
● Coordination Tool
General Arrangement sheets act as a shared coordination reference and help architects, engineers, and contractors align on the same layout. Because everyone sees the same evidence, decisions land faster.
● Reference Document
GA drawings guide construction, assembly, and manufacturing workflows. Teams use them as a go-to reference when questions emerge midstream. That makes them useful during execution and also during future upgrades.
Benefits of GA Drawings
GA drawings feel simple, but they drive serious project stability. They reduce errors, tighten communication, and protect your schedule. Explore their detailed benefits below!
● Ensure Design Accuracy and Clarity
Using GA drawings, you can capture dimensions, materials, and placements with clarity. That reduces misinterpretation and avoids early mistakes that snowball later. So you keep the design readable, even when the project gets messy.
● Facilitate Effective Communication
These drawings also create a shared visual language across disciplines. They help architects, engineers, fabricators, and contractors communicate without guesswork. As a result, coordination meetings shift from debates to decisions.
● Minimize Errors and Streamline Workflows
With GA drawings, you can expose conflicts early, before labor comes to the site. This way, you can save time and resources. Simply put, these drawings streamline workflows since teams experience fewer last-minute clarifications.
The Use of GA Drawings in the Construction Sector
Construction teams use General Arrangement information for different purposes. Below are the uses of these drawings in the construction world.
● Site & Building Layout Planning
Using General Arrangement drawings, you can get data on foundation placement for columns, footings, and beams. They also inform external work, like roads, parking, drainage, and utilities. So teams position the building correctly while respecting zoning and setbacks. That early clarity reduces site surprises later.
● Structural Design & Coordination
These drawings define the placement of load-bearing elements and systems. Using them or structural BIM modeling services from the experts in the industry, you can coordinate steel, concrete, and masonry for clean integration. Just as important, they show how MEP systems fit to prevent clashes. That supports smoother 3D spatial coordination inside tight ceiling and riser zones.
● MEP System Layouts
In GA drawings, you can see HVAC ducts and ventilation points for layout clarity. These sets also show plumbing routes and electrical distribution for coordinated installation. So MEP teams can check compatibility with the structure and architecture earlier. That reduces field changes, and it protects commissioning schedules too.
● Components Detailing & Fabrication
Using these drawings, you can get sizes, shapes, and specifications for components. GA drawings outline prefabricated elements, like steel beams or concrete panels, for assembly. They also note materials so teams hit durability and compliance expectations.
● Construction Sequencing & Scheduling
General Arrangement drawings guide phasing from excavation to finishing activities. Furthermore, they indicate temporary supports, scaffolding, and bracing during construction.
So teams coordinate trades better and reduce conflicts that trigger delays. That further helps superintendents plan weeks they can actually deliver.
● Safety & Compliance
These drawings mark fire exits, stairs, and suppression system locations as well as show ramps, corridors, and door clearances for accessibility planning. So teams verify compliance with codes and safety requirements earlier, which reduces redesign cycles during permitting.
● Renovations & Building Modifications
As-built General Arrangement drawings document existing structures for retrofit planning, so that teams can integrate new elements with existing systems without guesswork or demolition. They also show how current layouts can accommodate planned modifications, which keeps renovation work safer and more predictable.
● Communication & Collaboration
Using General Arrangement drawings, you can create a common reference for clients and project teams. These sets help stakeholders visualize and approve the design with less misunderstanding. Furthermore, they improve coordination across disciplines by keeping everyone on one map, so approvals smoothly move, and emails are reduced.
● Building Maintenance & Future Modifications
Facility teams use GA drawings to locate HVAC, plumbing, and electrical systems. They also support future upgrades, because additions must align with the existing structure, so operations teams spend less time hunting and more time fixing actual issues. This further makes the owner’s life easier long after turnover.
● Health & Eco Sustainability
General Arrangement drawings help teams integrate solar panels and efficient HVAC layouts, and also support drainage, waste management, and rainwater harvesting planning. In the results, sustainability features are land correctly identified, and maintenance teams understand them later. That helps owners reduce environmental impact without losing operational clarity.
Types of General Arrangement Drawings
Not every General Arrangement sheet answers the same question. So you should match the GA type to the discipline you’re coordinating.
● Structural GA Drawings
Structural General Arrangement drawings focus on columns, beams, slabs, and foundations. They highlight load-bearing elements that keep stability and safety in check. Moreover, they help teams follow design codes during coordination and execution, so structural intent stays visible as other disciplines layer in.
● Architectural GA Drawings
Architectural General Arrangement drawings emphasize layouts, finishes, and aesthetics. They include plans, elevations, and sections for walls, roofs, and openings. They also highlight door and window placements, materials, and finish intent.
● Mechanical GA Drawings
Mechanical General Arrangement drawings show piping, HVAC routes, and equipment placement. They capture duct and pipe routing while respecting airflow and performance needs as well as support systems integration, because equipment needs clearances and access. This ensures the mechanical design stays buildable and maintainable.
Difference Between Structural, Architectural, and Mechanical GA Drawings
| Factor | Structural GA Drawings | Architectural GA Drawings | Mechanical GA Drawings |
| Focus area | Stability, load distribution, safety compliance | Layouts, aesthetics, and user functionality | Systems integration, operational performance |
| Typical users | Structural engineers, contractors, fabricators | Architects, designers, interior teams | MEP engineers, technicians, maintenance teams |
| Level of detail | Reinforcement and load specifications | Finishes, materials, and layouts | Schematics and operational parameters |
Types of Views in GA Drawings
General Arrangement sheets rely on views, because one view never tells everything. So teams combine multiple projections to keep the whole story readable.
1. Top View
They are also called plan views that show the layout from above and clarify spatial relationships. They help teams see component positions, spacing, and key dimensions quickly.
Need Accurate BIM Drawings for Your Project? Contact Our BIM Experts Today!
Contact Us2. Front, Side, Rear View
They are actually Elevation views that show vertical arrangement and external features from a side. Seeing them, you can understand heights, facades, and how elements appear.
3. Section View
Section views cut through the structure and expose internal arrangement and connections. They help teams understand materials and interfaces that other views hide.
4. Isometric View
Using Isometric views, you can see a 3-D picture of how elements fit together. They help interpret complex assemblies before construction starts.
5. Detail View
Detail views zoom in and show joints, connections, and intricate features clearly. Using them, you can execute tasks accurately when small mistakes cause big headaches.
6. Exploded View
Exploded views separate components to show assembly order and fit sequence. They help teams assemble or disassemble complex systems with fewer surprises.
GA Drawings Notation & Symbols
GA drawings use standard symbols and notes to stay consistent, ensuring reading gets easier, even when teams switch projects or companies.
● Dimensions & Annotation
Linear dimensions show lengths, widths, and heights, while angular ones show angles. Similarly, leader lines, callouts, and tolerances clarify expectations for precision work.
● Structural Symbols
Columns show as filled shapes, and beams show as parallel lines with sizing notes. Walls also change line weight so that teams can spot structural versus partition walls.
● Electrical Symbols
GA Drawings use standard symbols for outlets, switches, wiring routes, and panels, ensuring that the electrical intent stays readable alongside structure and architecture.
● Elevation & Section Markers
Section lines show where a cut happens, and elevation arrows show viewing direction. This allows teams to easily jump between views without losing orientation.
● Notes & Legends
General notes communicate specifications, safety instructions, and installation guidance. And a legend key explains symbols and abbreviations, so teams interpret intent consistently.
Step to Create GA Drawings
1. Initial Plans & Conceptual Design
Start by setting objectives and gathering client requirements and project constraints. Then, explore options and lock in a preliminary arrangement for key components.
2. Data Collection & Measurement
Next, run site surveys to collect accurate measurements for construction projects. Also, document existing system details and component specifications carefully. Then, review building codes and safety requirements before drafting begins.
3. Draft GA Drawings
After that, choose plan, elevation, and section views based on project complexity. Then, place components and add dimensions that define spacing and alignment. You must use standardized symbols and notations for materials and tolerances.
4. Detail & Refine the GA Drawing
Now you add detailed views to clarify joints, connections, and internal arrangements. Furthermore, add exploded views when assembly sequences need visual clarity, ensuring that the drawing stays accurate and the build team stays confident.
5. Review & Quality Control
Next, review the drawing with engineers, architects, and consultants for accuracy and coordination across disciplines, so that structure, electrical, and mechanical systems integrate. Then, verify compliance with codes and industry standards before release.
6. Finalization & Distribution
After that, adjust the drawing based on review feedback for clarity and compliance. Then, submit it for stakeholder approval and distribute it for execution, so everyone builds from the same approved intent.
7. As-built Drawings/Ongoing Support
Last, record construction changes and update the drawing to match built conditions. Next, archive the final version for maintenance and future reference. This step protects owners when renovations start years later.
How to Read GA Drawings?
Reading a General Arrangement sheet feels simple until it suddenly doesn’t. So use this checklist when the drawing looks off.
1. Understand the Types of Views
Start by identifying plan, elevation, section, isometric, and detail views. Then, connect what you see in one view to the other views.
2. Check the Drawings Title & Legends
Check the title block for project identification, revisions, and version details and then read the legend, so every symbol and abbreviation stays consistent.
3. Examine the Dimensions & Scale
Read dimensions for lengths, widths, heights, depths, and spacing between elements.
Then check the scale, because the scale controls how you interpret proportions.
4. Identify Key Components & Symbols
Spot columns, beams, walls, pipes, ducts, and electrical symbols with confidence. After that, confirm the meaning in the legend before you assume anything.
5. Look for Section & Elevation Markers
Follow section markers to see internal arrangements, materials, and interface details. And follow elevation arrows, so that you understand which direction the view represents.
6. Review Notes & Annotations
Read notes for materials, tolerances, installation instructions, and safety considerations. Next, check whether notes change scope, clearances, or construction requirements.
7. Understand the Coordination with Other Systems
Compare the GA drawings with mechanical, electrical, and plumbing layouts, as well as verify alignment at integration points where systems connect or cross.
8. Analyze the Reference Mark & Gridlines
Use gridlines as a coordinate system and follow labeled reference points. They keep placement accurate during layout and installation work.
9. Review Revisions & Updates
Check the revision history table and look for revision clouds on the sheet, so that you avoid building from an outdated assumption.
10. Be Focused on Overall Layouts & Relationships
After details, step back and assess system integration across the whole sheet, and then confirm space planning and logical fit for every major element.

All About GA Drawings Standardization
General Arrangement clarity improves when teams follow common standards and layouts.
Consistency keeps symbols, notes, and sheet structures readable across stakeholders. Also, professionals align sheet naming and revisions early, so audits and handovers stay smooth later on.
Role of Standards in GA Drawings
Industry standards guide symbols, notation, layout, and dimension presentation. For example, BS EN ISO 7519:1997 provides guidance for GA and assembly drawings. Certified BIM drafters also align packages with ISO 19650 documentation when needed. That mindset supports BIM documentation standards without turning every issue into a debate.
Why is there a Need for Consistency & Clarity in Presentation?
Consistent symbols and terminology reduce confusion across companies and disciplines. They also improve coordination, because teams read drawings faster with fewer errors. This matters even more when teams share files across CAD and BIM platforms. So, standardization protects the project when software, vendors, and people change.
Modern CAD tools that Improve General Arrangement Output
Modern CAD tools help teams create General Arrangement sets with more consistency.
- AutoCAD supports detailed 2D work, so the General Arrangement sheets stay precise.
- Revit is used in Revit family services, and this pairs the General Arrangement views with BIM workflows for collaboration.
- SolidWorks supports heavy 3D visualization, so complex assemblies stay understandable.
Also, digital platforms track versions, so teams work from the current GA information. They also support real-time collaboration, which reduces coordination lag between disciplines.
Last but not least, advanced visualization helps teams interpret GA intent before approvals, so that meetings shift toward decisions, because everyone sees the same evidence quickly.
Also, check out the Guide CAD vs BIM to know the Difference Between CAD and BIM, plus Which One Do You Need for Your Project?
Conclusion
General Arrangement drawings keep projects readable when design complexity rises quickly. They support coordination, reduce errors, and guide execution through the building lifecycle. Similarly, they speed up estimates when you connect models, views, and quantities consistently. Also, when you standardize templates early, you cut review time and keep every stakeholder reading the same language.
If you need assistance, BIM Modeling provides BIM Modeling Services for contractors, builders, designers, architects, and engineers. The company builds coordinated models, then publishes General Arrangement sheets that stay consistent through revisions. In results, you get clearer approvals, smoother coordination, and quantities that support early pricing.
Commonly Asked Questions
What should a General Arrangement drawing include?
A strong General Arrangement sheet calls out key elements and access decisions. For example, teams often show equipment zones, utilities, floor levels, and column placements. They also mark access points, stairs, and the overall building shape for quick orientation, so that the drawing answers practical questions, not just academic ones.
Do modern CAD tools enhance GA drawings?
Yes, modern tools support precision and consistency, so teams work with fewer errors. Furthermore, they support version control, real-time collaboration, and clearer 3D visualization, so that teams understand designs faster, and they coordinate revisions with less friction.
Which industries can use GA drawings?
- Architecture teams use GA drawings to communicate layouts and aesthetic intent clearly.
- Construction teams use them for coordination from foundations through finishing.
- Manufacturing and industrial design teams use them for assemblies, piping, HVAC, and equipment layouts.
What are the requirements for general arrangement drawings?
Include accurate dimensions, scale, clear labels, orientation, and reference symbols. Also show key equipment, utilities, floor levels, columns, access points, and stairs. Additionally, show the overall structure shape, so teams understand context and placement fast.
What is a general assembly drawing?
A general assembly drawing shows how multiple parts come together as one system. It typically describes the overall build-up of components for a complete structure, so that teams can understand assembly intent before they dive into part-level details.
What to check before issuing General Arrangement drawings?
- First, verify symbols, legends, and notes, because misreads trigger rework.
- Next, confirm dimensions and scale, so teams don’t install from bad assumptions.
- Then, review the section and elevation markers, because they drive critical detail jumps.
- Finally, cross-check gridlines and reference points, so that the layout stays consistent.
